Medical tape may look simple, yet it performs a demanding clinical task. It helps hold dressings, tubing, electrodes, and small medical devices against moving skin. When selected and applied correctly, it can reduce shifting, friction, leakage, and accidental dislodgement. That matters beside a wound, around an IV site, or beneath an oxygen tube.
Wound-care expert Karen Zulkowski, PhD, RN, CWCN, has stated, “Tape is part of the treatment plan, not merely an accessory.” Her observation reflects daily clinical practice. Securement should support the patient without creating unnecessary pressure or skin trauma. Clean, dry skin improves adhesion. Gentle stretching can help positioning, but stretching tape directly across fragile skin may cause injury. Remove it slowly, while supporting the surrounding tissue. Small details matter.
This guide explores How medical tape helps secure devices and dressings through seven practical tips. It considers tape selection, skin preparation, application direction, edge control, movement, moisture, and safe removal. A transparent film may suit a catheter, while a soft cloth tape may better support a bulky dressing. No single product works for every patient. That is easy to forget.
Clinical judgment remains essential. Infants, older adults, and people with adhesive sensitivities need closer observation. Redness, blistering, pain, or repeated lifting signals a problem. The tape may be wrong. The technique may be rushed. Even experienced caregivers can miss these signs during a busy shift. Careful reassessment keeps securement useful, comfortable, and safer.
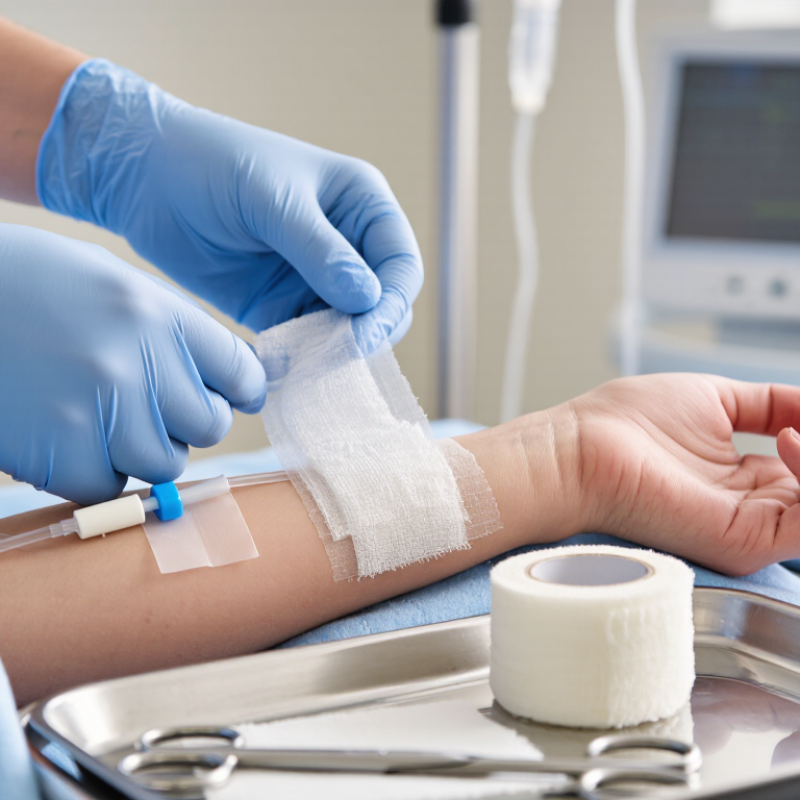
What Medical Tape Is and How It Secures Devices and Dressings
Medical tape is a flexible adhesive material used to secure dressings, tubing, electrodes, and small medical devices. It helps reduce movement while allowing the skin to breathe. The correct tape depends on skin condition, moisture, body location, and how long support is needed. In clinical practice, clean and dry skin usually improves adhesion. However, stronger adhesion is not always better.
Tip 1: Check the skin first. Avoid irritated, broken, or infected areas unless directed by a healthcare professional. Tip 2: Cut enough tape to support the device without covering too much healthy skin. Tip 3: Apply the tape smoothly, without wrinkles. Wrinkles can create pressure points. Tip 4: Secure the device, not the patient’s circulation. Never wrap tape tightly around a limb.
Tip 5: Choose a gentler option for fragile or elderly skin. Removing tape slowly, while supporting the skin, may reduce discomfort. Tip 6: Watch for lifting edges, moisture, redness, itching, or numbness. Replace the dressing or tape when its protection becomes unreliable. Tip 7: Keep tubes visible and avoid placing tape over connection points. I have sometimes focused too much on firm fixation and overlooked skin comfort. That is a useful reminder: secure devices carefully, but reassess them regularly. When a device causes pain, swelling, unusual drainage, or breathing difficulty, seek professional medical advice promptly.
How Medical Tape Secures Devices and Dressings
Medical tape helps maintain contact between a dressing or device and the skin by supporting fixation, protecting wound coverage, reducing movement, and allowing safe removal when the right tape is selected.
This chart presents seven practical securing functions of medical tape. The value represents the number of distinct securing actions represented by each tip, not a clinical performance score.
How to Select the Right Medical Tape for Each Application
Choosing medical tape starts with the patient, not the package. Assess skin condition, moisture, hair, movement, and the device’s weight. Fragile or aging skin usually needs a gentle adhesive with controlled removal. Active patients may need stronger fixation and a flexible backing. Breathable tape can help reduce moisture buildup around dressings.
Match the tape to the application. Use narrow tape for tubing and wider tape for larger dressings. For joints, select a tape that stretches without pulling excessively on the skin. Damp areas need moisture-resistant fixation, but the surrounding skin should be clean and dry before application. Avoid covering irritated skin unless the product instructions and clinical protocol permit it. Always check intended use, wear time, and removal guidance.
A small test area can reveal redness or discomfort before full application. Smooth the tape down without wrapping it tightly. Leave enough slack around moving limbs and inspect the site regularly for lifting, swelling, or skin damage. I have found that stronger adhesion is not always better; difficult removal can create a second problem. Selection may need adjustment after movement, sweating, or several hours of wear. When uncertain, consult a qualified healthcare professional and follow local procedures.
7 Tips: How Medical Tape Helps Secure Devices and Dressings — How to Select the Right Medical Tape for Each Application
| Tip |
Primary Application |
Recommended Tape Category |
Useful Characteristics |
Why It Helps Secure the Device or Dressing |
Selection and Safety Considerations |
| 1 |
Secure gauze, non-woven pads, and primary dressings |
Paper tape or soft non-woven tape |
Lightweight, breathable, easy to tear, gentle adhesive |
Helps keep the dressing in contact with the wound while allowing routine inspection and repositioning. |
Best for low-tension areas and short-term fixation. Avoid placing adhesive directly over an open wound. |
| 2 |
Secure dressings on joints or moving areas |
Elastic or conformable cloth tape |
Flexible, conformable, moderate tensile strength |
Adapts to moderate movement and body contours, reducing edge lifting and dressing displacement. |
Do not wrap tightly. Check circulation, sensation, skin color, and swelling when applied around a limb. |
| 3 |
Anchor IV tubing, extension sets, and lightweight lines |
Transparent film tape or securement dressing |
Transparent, thin, breathable, moisture-resistant |
Permits visual observation of the insertion area and helps limit accidental pulling or movement. |
Use only products intended for catheter or line securement. Keep the insertion site visible when clinical assessment is required. |
| 4 |
Secure tubes, drains, and heavier external devices |
High-adhesion cloth or reinforced fixation tape |
Higher holding power, conformability, tear resistance |
Provides stronger anchoring against traction and repeated movement than lightweight paper tape. |
Use the minimum amount needed and avoid excessive tension. Inspect the skin frequently, especially in older adults or patients with fragile skin. |
| 5 |
Protect fragile, sensitive, or frequently taped skin |
Silicone adhesive tape or low-trauma tape |
Gentle removal, repositionability, reduced skin stripping |
Can reduce mechanical stress during removal while still providing temporary fixation. |
Consider for neonates, older adults, and patients with skin tears or adhesive-related injury. Perform a skin assessment before and after use. |
| 6 |
Maintain adhesion in humid or moisture-prone conditions |
Water-resistant film or moisture-resistant cloth tape |
Moisture resistance, flexible backing, reliable edge adhesion |
Helps reduce premature lifting caused by perspiration, incidental splashes, or wound-fluid exposure. |
The skin should be clean and dry before application. Water-resistant does not necessarily mean waterproof or suitable for prolonged immersion. |
| 7 |
Support short-term closure of superficial skin edges |
Skin-closure strips |
Narrow, strong, breathable, designed for skin-edge approximation |
Provides gentle tensile support across selected superficial wounds after appropriate clinical closure. |
Not intended for infected, heavily exuding, deep, gaping, or high-tension wounds. Application should follow clinical assessment and product instructions. |
General selection rule: Match the tape’s adhesion, flexibility, breathability, moisture resistance, and removal characteristics to the application, skin condition, expected movement, and required wear time. Apply to clean, dry, intact surrounding skin unless the product is specifically designed for another use. Follow institutional procedures and the manufacturer’s instructions for use.
How to Prepare the Skin Before Applying Medical Tape
Before medical tape secures a dressing or device, skin preparation determines how well it stays and how safely it removes.
The skin should be assessed for redness, moisture, wounds, hair, and previous adhesive reactions. Clean visible soil gently with an appropriate cleanser, then pat the area completely dry. Do not rush.
The World Health Organization’s surgical-site infection guideline reports that infections affect 11% of surgical patients in low- and middle-income countries. Clean technique therefore matters, even when applying simple bedside tape. Avoid placing tape over broken skin unless the care plan specifically allows it. If hair interferes, clip it carefully instead of shaving, which may create microscopic cuts. Alcohol-based preparations can reduce surface contamination, but the skin must dry fully before taping. Wet antiseptic can weaken adhesion and increase irritation.
A 2023 systematic review in the International Wound Journal found reported medical adhesive-related skin injury rates ranging from
3% to 34%,
depending on the clinical setting and assessment method. That range is a warning: preparation is not identical for every patient. For fragile or elderly skin, use minimal friction and consider a protective barrier when clinically suitable. Check that no lotion, oil, powder, or excess moisture remains. Apply tape without stretching it across the skin. I sometimes see fixation fail because preparation was treated as a minor step. It is not. Reassess the skin after removal, and record reactions to improve the next application.
Seven Practical Ways to Improve Tape Security and Comfort
7 Tips How Medical Tape Helps Secure Devices and Dressings
Seven Practical Ways to Improve Tape Security and Comfort
Medical tape works best when the skin is clean, dry, and free from lotion. Check the skin before application, especially around fragile or irritated areas. Choose a tape designed for the patient’s skin condition and the dressing’s purpose. A breathable option may improve comfort during longer wear. Cut enough tape to cover the edges without wrapping tightly. Leave slight slack around tubes and wires to reduce pulling during movement.
Press the tape gently from the center outward, then smooth every edge. Avoid stretching it while applying. Stretching can create tension, redness, or painful removal. Add support near joints or high-movement areas, but do not cover the insertion site unnecessarily. Secure tubing in a relaxed curve instead of a sharp bend. This small detail can prevent accidental tugging. Keep the dressing visible when possible, so staff can inspect it without removing extra tape.
Observe the site regularly for moisture, swelling, itching, or new redness. Replace loose or damp tape according to clinical instructions. Remove it slowly, supporting the skin with one hand. In practice, perfect security is not always possible; movement, sweat, and sensitive skin can defeat a careful application. Reassess the method rather than adding endless layers. When discomfort continues, ask a qualified healthcare professional to review the dressing and fixation plan.
How to Remove Medical Tape Safely and Inspect the Skin
Removing medical tape safely protects the skin that supports a dressing or device. Wash your hands and explain each step to the patient. Check whether the tape covers a wound, catheter, or other device before touching it.
Start at one corner and loosen the edge slowly. Pull the tape back over itself, keeping it close and parallel to the skin. Use your other hand to support the skin. Never lift the tape sharply upward. It may feel quicker, but it can cause pain, redness, or a skin tear. I once underestimated how firmly tape could grip dry skin. That small mistake taught me to slow down.
If the tape resists, pause. A warm, damp cloth may soften some adhesives, but keep moisture away from the wound and device connection. An adhesive remover should only be used when approved for that skin and clinical situation. Do not apply oils or household solvents. They can irritate skin or affect device adhesion.
After removal, inspect the area under good light. Look for redness, swelling, blisters, broken skin, bruising, warmth, or unusual drainage. Ask about itching, burning, and tenderness. Mild redness may fade, but worsening pain or spreading redness needs professional assessment. Record what you observe, including the tape location and removal time. Small details matter.
Conclusion
How medical tape helps secure devices and dressings depends on choosing the right tape, preparing the skin properly, and applying it with care. Medical tape can hold wound dressings, tubing, sensors, and other lightweight devices in place while allowing necessary movement. Selection should consider skin sensitivity, moisture, location, wear time, and the level of support required. Before application, clean and dry the skin, remove oils or lotions, and check for irritation or broken areas.
To improve security and comfort, apply tape to clean skin with gentle, even pressure, avoid excessive tension, support device tubing without restricting circulation, and reinforce edges when needed. Rounded corners and appropriate tape length can help reduce lifting and friction. During removal, loosen the tape slowly in the direction of hair growth while supporting the skin. Afterward, inspect for redness, swelling, blisters, or discomfort, and allow the area to recover before reapplying tape. These simple steps promote reliable fixation while helping protect skin health.

 Wigivida Medical